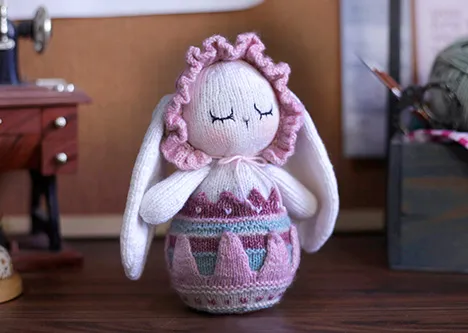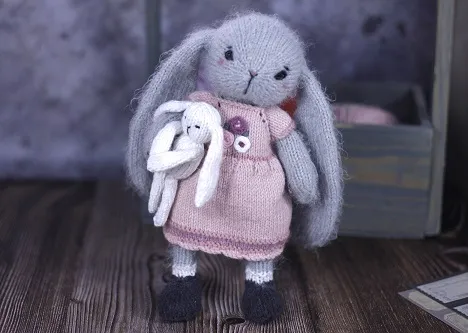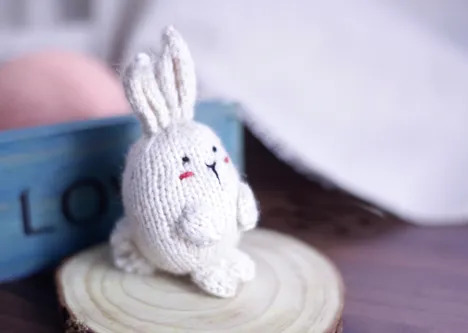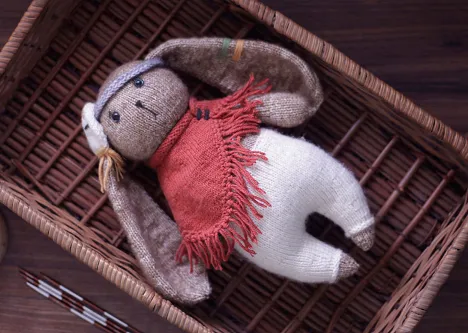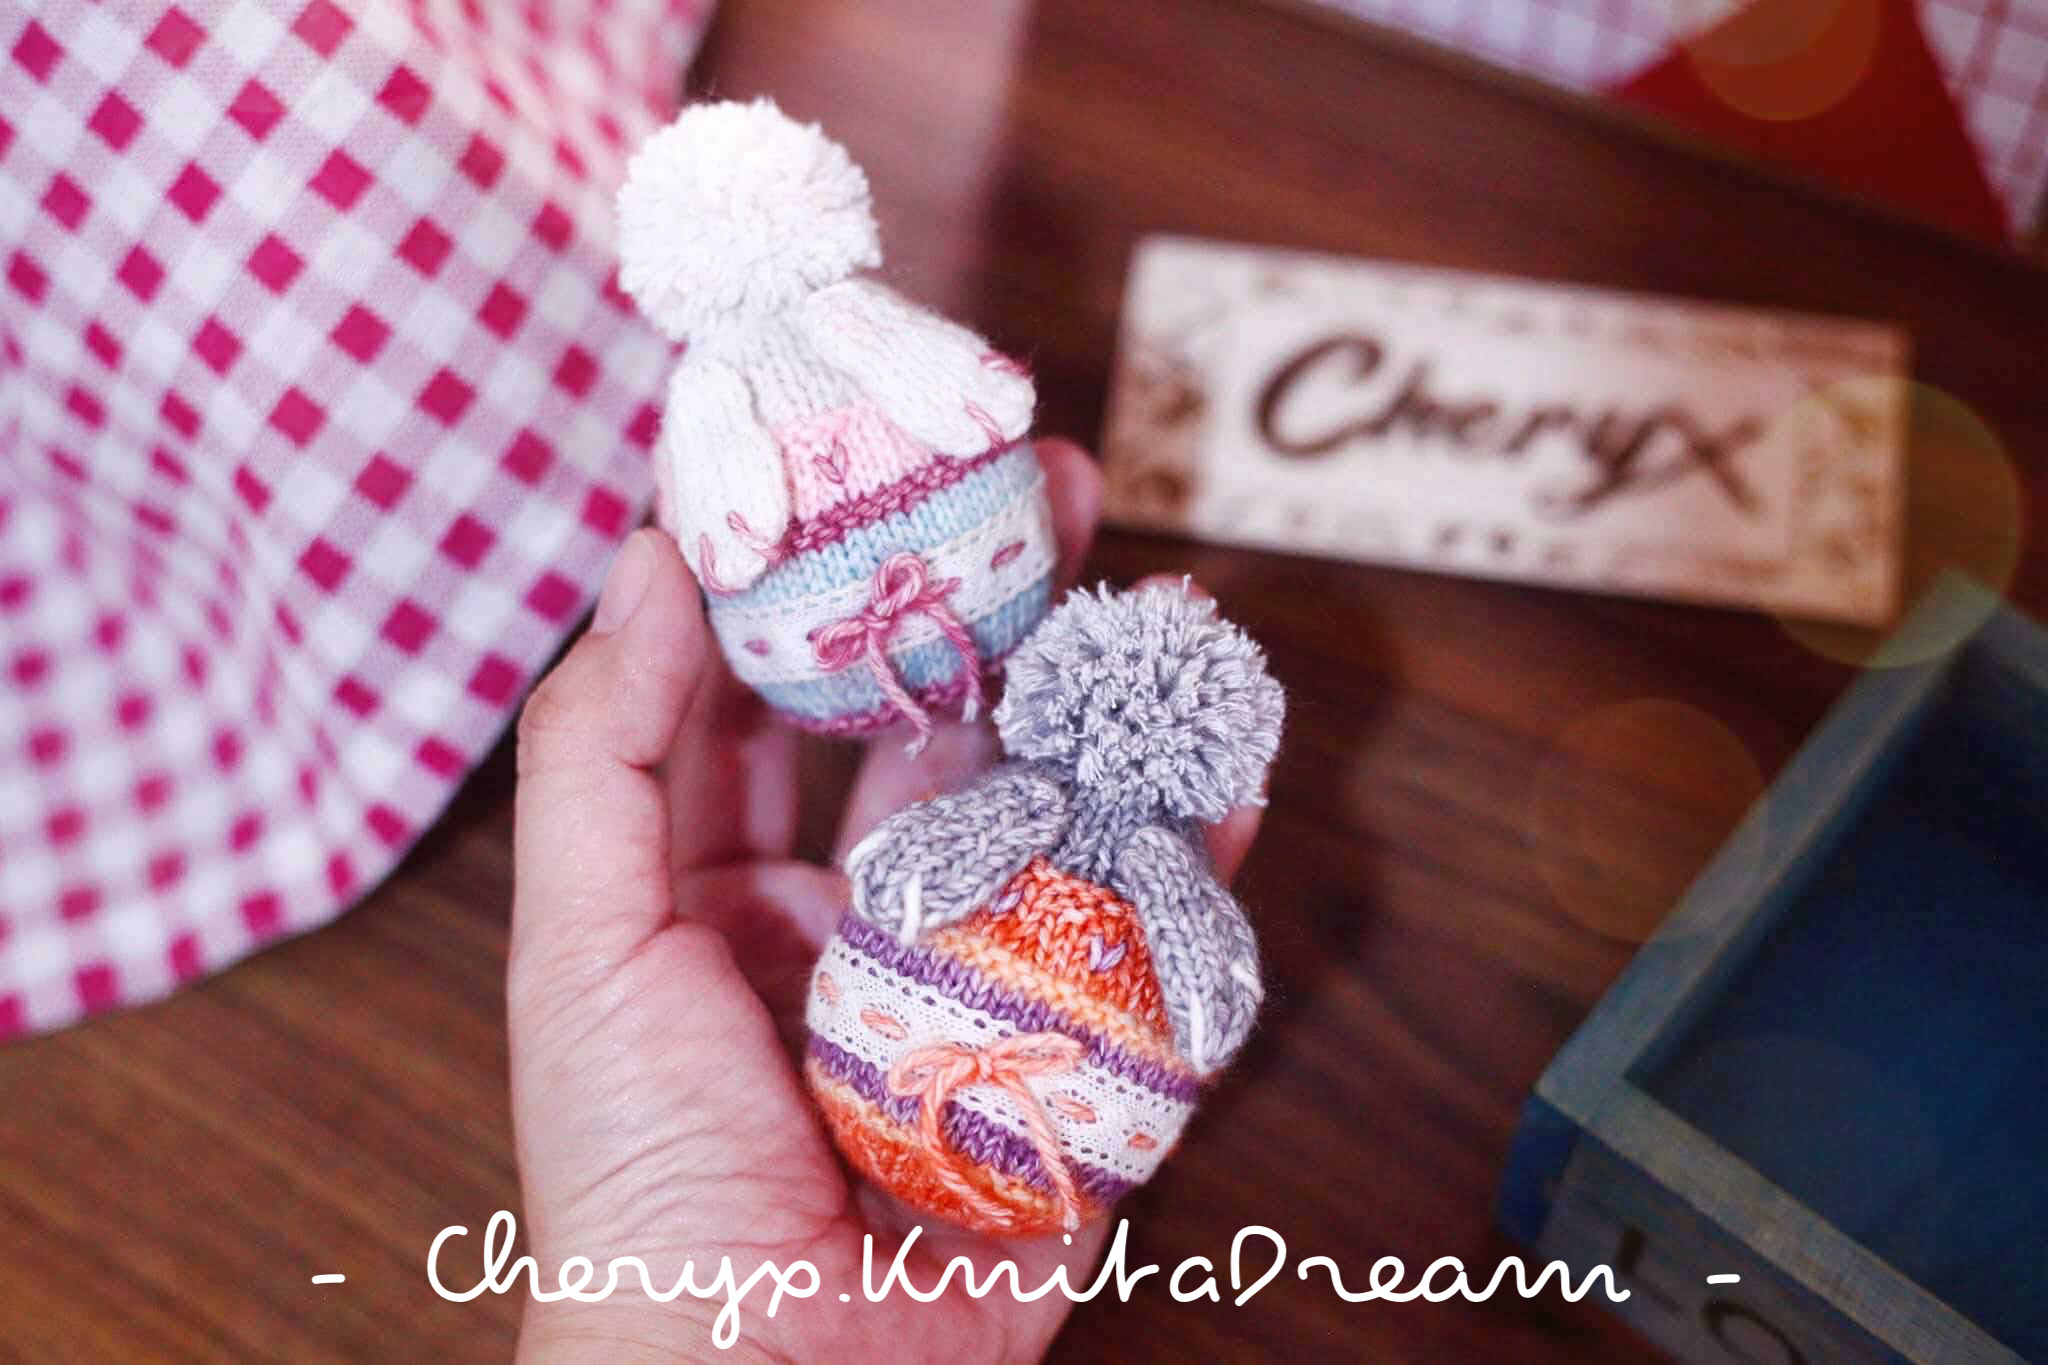
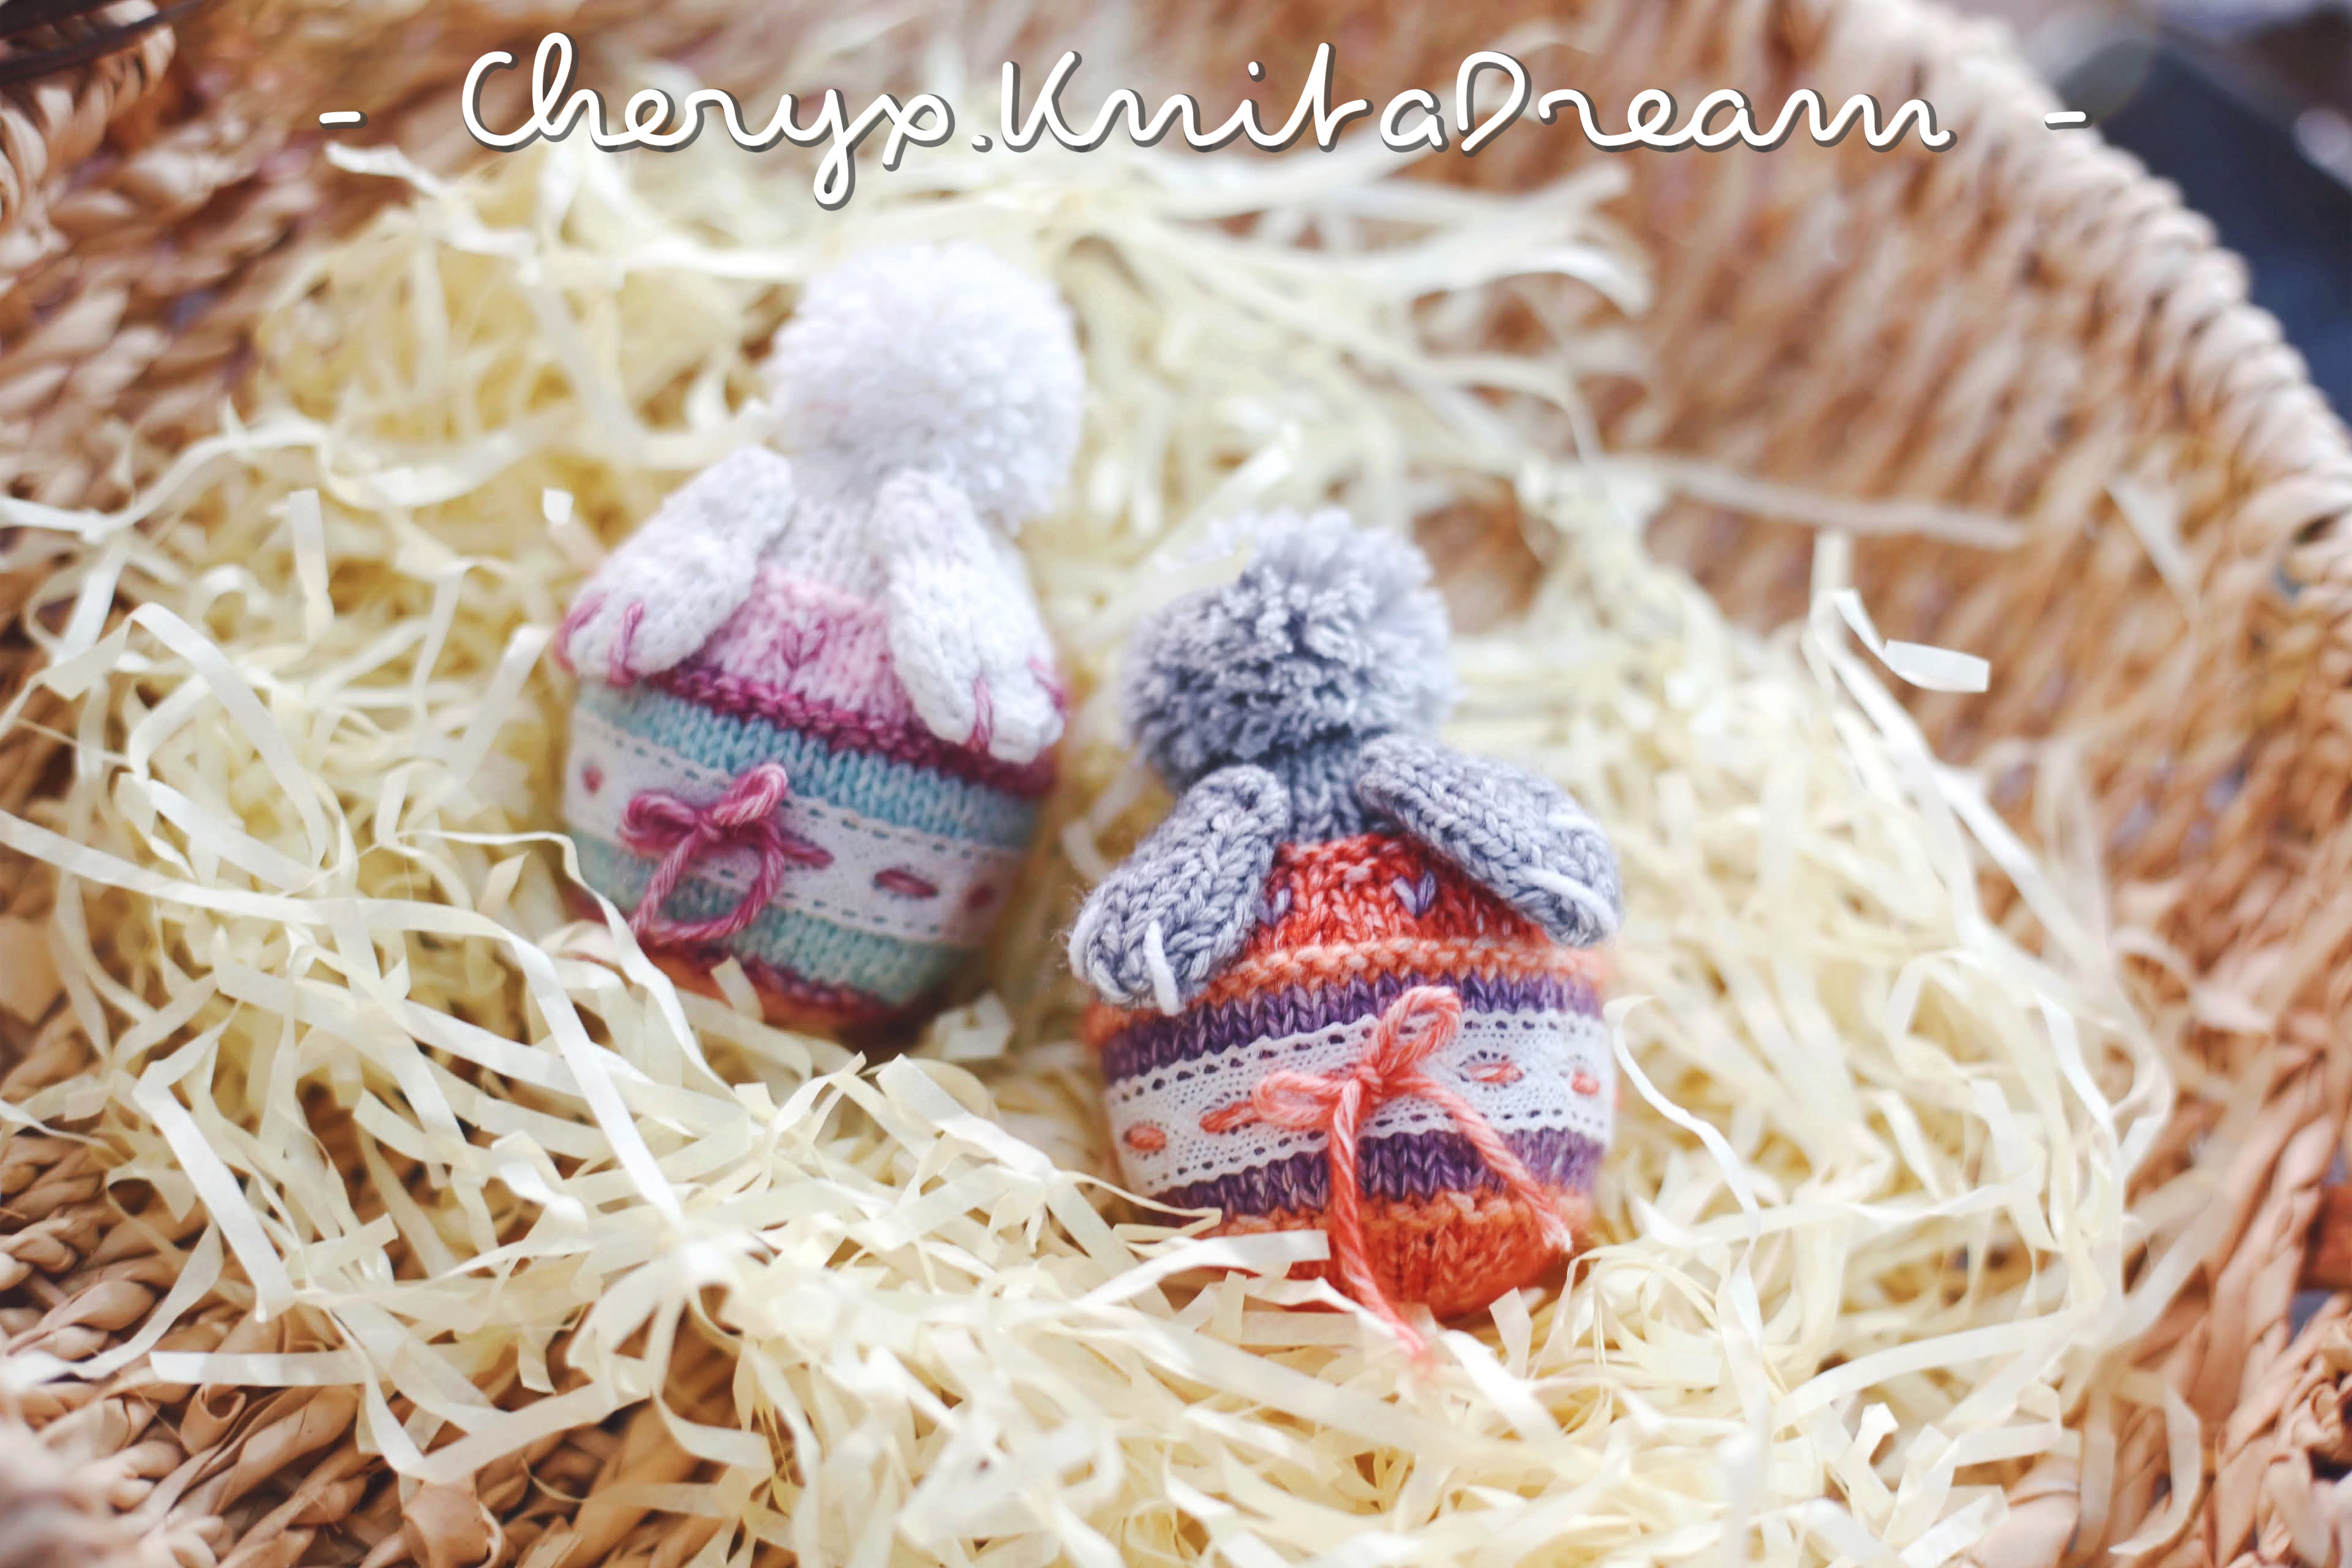
Easter is coming soon! If you're looking for creative handmade to the season, this Easter Bunny Egg knitting pattern is just what you need. Combining the timeless tradition of Easter eggs with the cuteness of a tiny bunny, this project is simple, fun, and perfect for knitters of all levels.
Whether you're crafting for Easter baskets, decorating your home, or gifting something special, these little bunny eggs will bring smiles all around. Plus, they’re a great way to use up leftover yarn and experiment with colors!
So grab your needles, pick your favorite yarn, and let’s knit some adorable bunny eggs!
Happy knitting and happy Easter!
MATERIALS
- A pair of 2.5mm straight knitting needles
Yarn for Sample A:
- Scheepjes Stone Washed Yarn : Yarn A: Orange 816, Yarn B: Light orange 834, Yarn C: Purple 811, Yarn D: Gray 802
Yarn for Sample B:
- Scheepjes Stone Washed Yarn Yarn A: Pink 820, Yarn B: Dark pink 808, Yarn C: Blue 828
- Jeans yarnart : Yarn D White 01
Other Materials
- The ribbon is 1.5cm wide and approximately 14cm long.
- Toy filling (less than 20g)
- Sewing needle
- Scissors
- Sewing pins
SIZE
The finished toy is 10cm tall
KNITTING PATTERN
Egg shell and bunny (Knit 1)
Cast on 8 stitches with Yarn A.
Row 1: P ( 8 sts)
Row 2: K1, (K1, KLL) x6, K1 (14 sts)
Row 3: P
Row 4: K1, (K1, KLL) x12, K1 (26 sts)
Row 5: P
Row 6: K1, (K4, KLL) x6, K1 (32 sts)
Row 7: P
Row 8: K1, (K5, KLL) x6, K1 (38 sts)
Row 9: P
Cut Yarn A and continue knitting with Yarn B.
Row 10: K1, (K3, KLL) x12, K1 (50 sts)
Row 11: K (This row is on the wrong side, but knit “K”)
Cut Yarn B and continue knitting with Yarn C.
Row 12: K (50 sts)
Row 13: P
Row 14 – Row 21: St st
Cut the yarn C and continue knitting with yarn B.
Row 22: K (50 sts)
Row 23: K (This row is on the wrong side, but knit “K”)
Cut Yarn B and continue knitting with Yarn A.
Row 24: K (50 sts)
Row 25: P
Row 26: K1, (K2, K2tog) x12, K1 (38 sts)
Row 27: P
Row 28: K1, (K2, P2) x9, K1 (38 sts)
Row 29: K (This row is on the wrong side, but knit “K”)
Cut Yarn A and continue knitting with Yarn D.
Row 30: K (38 sts)
Row 31: P
Row 32: K1, (K1, K2tog) x12, K1 (26 sts)
Row 33: P
Row 34 – Row 37: St st
Row 38: K1, K2tog x12, K1 (14 sts)
Row 39: P Row 40: K2tog x7 (7 sts)
Leave a long tail for sewing, then cut the yarn. Thread this tail through the remaining stitches and pull tightly.
Feet (Knit 2)
Cast on 8 stitches with Yarn D.
Row 1: K (8 sts)
Row 2: P
Row 3: K
Row 4: P
Row 5: K1, (K3, KLL) x2, K1 (10 sts)
Row 6: P
Row 7: K1, (K4, KLL) x2, K1 (12 sts)
Row 8: P
Row 9: K
Row 10: P
Row 11: K1, K2tog, K1, K2tog x2, K1, K2tog, K1 (8 sts)
Row 12: P
Row 13: K2tog x4 (4 sts)
Leave a long tail for sewing, then cut the yarn. Thread this tail through remaining stitches and pull up tightly.
SEWING AND DECORATING
We will sew and decorate the Easter Bunny egg as shown in this video, using the Mattress Stitch and Whip Stitch.
Don't forget to share your photos of your finished dolls with me on Instagram using the hashtag #Cheryx.Knitadream.
----------------------------------------------------------
Happy knitting and happy Easter!
✿ If you love my free patterns,tips and tutorial videos and you would like to support , you can Buy Me A Coffee.
I really appreciate your support, it's my motive and I will try to do more. Thank you so much!

-